Wednesday, December 19, 2007

Home Generator Information

You should first consider those things that the Church of Jesus Christ of Latter-day Saints has suggested. Storage of food, water and financial reserves are likely important to consider BEFORE getting an emergency home generator. However, if you need to have electric service to heat your house, or perhaps to run an oxygen machine, consider a generator set-up.

A Home Generator:
  • Is Expensive
  • Requires a fair amount of maintenance
  • Might be dangerous if not used properly
  • Can be very noisy
  • Can be a real blessing at times (during long power outages can provide well water, heat, lights and the microwave oven, TV and even the Internet)

Do Not Buy a Generator if:

  • You have not stored food and water for all of your family members.
  • You don't have at least $1000.00 or more to spend.
  • You don't have a place to run it outside, or if you don't want to do the maintenance.

I Bought a Generator Because:

  • We seem to lose power frequently.
  • We have no neighbors to complain; the noise only bothers us. (I did install a quieter muffler)
  • I could install it myself with the transfer panel.
  • We felt we had the money for it; I do the maintenance myself.

If I Had to Do it Again, I would:

  • Buy a better generator with a quieter muffler, maybe better voltage regulation.
  • Run wiring from the outside of the house so the cable did not have to go under the garage door.

Different Types of Generators are:

  • Small portable units: Typical use for camping--may be too small for home emergency use.
  • Low cost units (with wheels): Light duty, 4000 to 7500 watts
  • Heavy duty units (with or without wheels): More expensive, greater life.
  • Permanently installed automatic operation units: Expensive, outside location.

Where would you buy a generator and the transfer switch panel?

  • Home Depot or Lowe's
  • Lots of other places (see web links)

A Generator Runs on:

  • Gasoline: Expensive
  • Propane: Nice if you have that available anyway
  • Heating oil/diesel: Same as above

Types of Home Generators:

  • Portable 5000 VA with wheels--use outside of the house
  • Portable small units--use outside for camping
  • Permanently installed--automatic operation 8000 VA or larger--normally located outside your house.

How to use a generator:

  • Install a generator transfer switch panel connected to your house electrical circuit breaker panel.
  • OR just plug in necessary equipment with extension cords.
  • DO NOT back feed the generator. This is dangerous to you and possibly someone working on the power lines.

Here are some generator websites and how to use them:

Source: Jeff Porter, 28 April 2007

Thursday, December 6, 2007

Family Disaster Plan

Every Family needs to plan for what might happen.

You should sit down with your family and talk about:
  • What types of disasters might happen
  • What you should do to prepare (like creating a family disaster kit, i.e. 72 hour kit)
  • What to do if you are asked to evacuate

You should talk to your family about:

  • Where to meet away from your home in case of a fire (like a neighbor's house or the corner of the street);
  • Where to meet outside your neighborhood if you must evacuate. You should pick a friend or relative's house.
  • Where to call to "check in" if you become separated from your family during a disaster. You should memorize the phone number of a family member who lives out of state. You call there to report where you are so your family can find you.

You can also talk to your whole neighborhood about disaster plans Find out if someone in your neighborhood has a special skill--like being a doctor.

Be sure your home has a smoke detector and remember to change the batteries twice a year. It's also a good idea totake a first aid class so you will be prepared to help others.

EMERGENCY PLAN

Out of State Contact

Name:______________________________________

City: _______________________________________

Telephone (Day)______________

(Evening) ___________________

(Cell) ______________________

Local Contact

Name: _____________________________________

City: ______________________________________

Telephone (Day)_______________

(Evening) ____________________

(Cell) _______________________

Nearest Relative

Name: ______________________________________

City:________________________________________

Telephone (Day)_______________

(Evening) ____________________

(Cell) _______________________

Family Work Numbers

Father_______________________

Mother ______________________

Other _______________________

Emergency Telephone Numbers

In a life threatening emergency, dial 911 or the local emergency medical services system number

Police Dept_________________________

Fire Dept__________________________

Hospital___________________________

Family Physicians

Name_____________________________

Phone_____________________________

Name_____________________________

Phone_____________________________

Name_____________________________

Phone_____________________________

Reunion Locations

1. Right outside your home_______________

__________________________________

2. Away from neighborhood, in case you cannot return home

__________________________________

__________________________________

Escape Plan

In a fire or other emergency, you may need to evacuate your home on a moment's notice. You should be ready to get out fast.

Develop an escape plan by drawing a floor plan of your residence. Using a black or blue pen, show the location of doors, windows, stairways,a dn large furniture. Indicatethe location of emergency supplies (Disaster Supplies Kit), fire extinguishers, smoke detectors,collapsible ladders, first aid kits, and utility shut off points. Next, use a colored pen to draw a broken line charting at least two excape routes from each room. Finally, mark a place outside of the home where household members should meet in case of fire.

Be sure to include important points outside such as garages, patios, stiarways, elevators, driveways and porches. If your home has more than two floors, use an additional sheet of paper. Practice emergency evacuation drills with all household members at least two times each year.

Source: Becky Potts

Information Page for Each Emergency Pack (72 hour kit)

Name: ____________________________________________

Address: __________________________________________

Phone number: _____________________________________

Family members:____________________________________

_________________________________________________

Medical Problems: ___________________________________

Allergies: _________________________________________

Medications: _______________________________________

Local person to call in case of emergency: ___________________

Non-local person to call: _______________________________

Blueprint for a Basic 72-Hour Emergency Pack

1. Container: Use back pack, suitcase, duffle bag, etc. It's a good idea to keep a list of what's in the pack on the outside. Also put expiration dates on list, or on foods themselves. A good time to rotate food would be when you change the clocks. Store in a place where you can grab it quickly if necessary.

2. Important Information and Money: Keep a little money (small bills), and some change for phone calls or bridge tokens. You may want to have a phone card. Keep your car filled with gas, and perhaps have spare keys in your pack. Have important information such as name, phone numbers for emergency (one local, one not), list of phone numbers you may want to call, medical problems, allergies, medications, etc. You may want to keep a 3-day supply of medicine in your pack, rotate when you getyour prescriptions filled. Some people like to include copies of important papers such as birth certificate, marriage certificate, credit card list; family pictures; genealogy; inventory of house items in case of fire emergency.

3. Water: A minimum of 1 quart per person per day for drinking. Can buy water bottles, or fill 2 liter soft drink bottles, or plastic gallons such as cranberry juice. Some have handles for easy carrying. Plastic milk bottles are not suggested because they will eventually disintegrate. Change water at least once a year. If you fill your own water bottles, put 4 drops of bleach for each 2 quarts of water. you may want to carry water purification tablets in your pack. You may also carry a small water filter.

4. Food: Whatever you like which would keep you alive for 3 days. Tuna fish or chicken in packages, crackers, nuts, granola bars, energy bars, fruit in plastic cups. Don't forget a can operner if you stored canned goods. Be sure to rotate, maybe at General Conference time. You can eat the food while you watch conference.

5. Clothing: Sweat pants and sweat shirts are good-can be cut off for summer. Dry socks, change of underwear, extra shoes. Grab winter coat, etc. on way out of door. For children, change clothing as they grow.

6. Personal Items, First Aid Kit, Misc.: Toiletries: toothpaste, toothbrush, soap, deodorant, lotion, kleenex, toilet paper, anything else you can't live without. First Aid Kit: bandaids, alchohol wipes, etc. Misc.: Battery powdered radio and extra batteries, flashlight and extra batteries, emergency candle, duct tape, twine, paper towels, pad of paper, pencil, sewing kit (thread and needle, safety pins, small scissors), aspirin, scriptures, sleeping bags.

Source: Connie Hogan

Blueprint for a More Complete 72-Hour Emergency Pack

Advance Preparation


  1. First-aid skills

  2. Physical Fitness

  3. Family Evacuation Plan

  4. List of useful phone numbers and addresses

  5. What kind of disasters can occur where I live?

  6. How will family members contact each other?

  7. Where will we meet?

Types of Containers for Pack


  • Backpack

  • Suitcase

  • Duffle bag

  • Five-gallon plastic bucket

Types of Water Containers


  • Canteen

  • Bottled Water

  • Water pouches/boxes

  • Soft drink bottles

Clothing


  • Underwear

  • T-shirt

  • Sweatshirt

  • Socks

  • Long pants

  • Sweater

  • Raincoat or poncho

  • Winter coat, if appropriate

  • Gloves, cap, scarf

  • Sturdy Shoes

  • Handkerchiefs

Food (be sure to rotate at least annually)


  • MREs

  • Freeze-dried food

  • Granola bars

  • Nuts

  • Dried Fruits

  • Energy Bars

  • Small cans of tuna

  • Beef jerky

  • Hard candy

  • Peanut butter

  • Cup-a-soup

  • Crackers

  • Small cans of fruit

  • Granola

  • Milk powder

  • Hot cocoa mix

  • Chocolate

First-Aid


  • Consecrated oil

  • Vitamins

  • OTC pain medication

  • Cold/flu medications

  • OTC allergy medications

  • Prescription medications

  • Tape Gauze

  • Antibiotic ointment

  • Band-aids

  • Sling

  • Instant ice packs

  • Rubber/latex gloves

  • Thermometer

  • Sun screen

  • Extra eye glasses

  • First-aid book

  • Insect repellent

  • Lip balm

Bedding/Warmth


  • Sleeping bag (and pad)

  • Blankets

  • Foil emergency blanket

Shelter


  • Tent

  • Sleeping bag (and pad)

  • Tube tent

Sanitation


  • Toilet paper

  • Plastic bucket with tightly fitting lid

  • Plastic bags and ties

Money


  • $20 - $100 in small bills

  • Quarters for the phone (or phone card)

  • Checkbook, ATM cards

Scriptures

Source: Connie Hogan

Spit Cooking

A spit is simple to make for use with either charcoal or wood. Two notched sticks set in the ground and another placed across with meat tied on it with cotton string is all that's necessary. It need not be turned constantly, only every 10-15 minutes. You can usually place the fire to one side and slow roast your meat. This allows you to use the fire for other things. You can keep a fairly small fire alongside your spit, continually burning with coal from under the Dutch oven. Wrap vegetables (try carrots and celery) in aluminum foil with a touch of butter and potatoes wrapped in foil or unwrapped. It's possible to make baked potatoes, fresh bread, roast chicken, and carrots and celery at the same time. If the bread is finished before everything else comes off the fire and cobbler is started at that time, dessert is ready when the main course is done.

All of this can be fun. With a little practice and willingness to try, your family will look forward to cooking this way.

Good luck!

Source: George & Sherry Macialek

Spiritual Preparedness: Quotes

"And now, my sons, remember, remember that it is upon the rock of our Redeemer, who is Christ, the Son of God, that ye must build your foundation; that when the devil shall send forth his mighty winds, yea, his shafts in the whirlwind, yea, when all his hail and his mighty storm shall beat upon you, it shall have no power over you to drag you down to the gulf of misery and endless wo, because of the rock upon which ye are built, which is a sure foundation, a foundation whereon if men build they cannot fall." - Helaman 5:12

"What is the most important item to have stored in your year's supply? My response was seriously given--'personal righteousness.'" - President Marion G. Romney


"Prepare ye, prepare ye for that which is to come, for the Lord is nigh." - D&C 1:12


"We need to make both temporal and spiritual preparation for the events prophesied at the time of the Second Coming. And the preparation most likely to be neglected is the one less visible and more difficult--the spiritual. A 72-hour kit of temporal supplies may prove valuable for earthly challenges, but, as the foolish virgins learned to their sorrow, a 24-hour kit of spiritual preparation is of greater and more enduring value.

"We are living in the prophesied time 'when peace shall be taken from the earth' (D&C 1:35,) when 'all things shall be in commotion' and 'men's hearts shall fail them' (D&C 88:91.) There are many temporal causes of commotion, including wars and natural disasters, but an even greater cause of current 'commotion' is spiritual" - Elder Dallin H. Oaks


"Most of us have thought about how to prepare for storms. . . But there is another even more important preparation we must make for test that are certain to come to each of us. That preparation must be started far in advance because it takes time. What we will need then can't be bought. It can't be borrowed. It doesn't store well. And it has to have been used regularly and recently.

"What we will need in our day of testing is a spiritual preparation. It is to have developed faith in Jesus Christ so powerful that we can pass the test of life upon which everything for us in eternity depends. We were promised that we would have Jehovah, Jesus Christ, as our Savior and Redeemer. And He would make it possible for us to pass the test of life if we exercised faith in Him by being obedient.

"It will take unshakable faith in the Lord Jesus Christ to choose the way to eternal life. It is by using that faith we can know the will of God. It is by acting on that faith we build the strength to do the will of God. And it is by exercising that faith in Jesus Christ that we can resist temptation and gain forgiveness through the Atonement.

"Learning to start early and to be steady are the keys to spiritual preparation. Procrastination and inconsistency are its mortal enemies.

"Let me suggest to you four settings in which to practice quick and steady obedience.

  1. The command to feast upon the word of God.

  2. Is to pray always.

  3. Is the commandment to be a full-tithe payer.

  4. Is to escape from sin and its terrible effects.

"Each takes faith to start and then to persevere. And all can strengthen your capacity to know and obey the Lord's commands." - Elder Henry B. Eyring


"I believe that the Ten Virgins represent the people of the Church of Jesus Christ. . . They (five foolish) had the saving, exalting gospel, but it had not been made the center of their lives. They knew the way but gave only a small measure of loyalty and devotion.


"The foolish asked the others to share their oil, but spiritual preparedness cannot be shared in an instant. . . . This was not selfishness or unkindness. The kind of oil that is needed to illuminate the way and light up the darkness is not shareable. . . . In our lives the oil of preparedness is accumulated drop by drop in righteous living." - President Spencer W. Kimball


Wednesday, November 28, 2007

Financial Preparedness: On-going Home Maintenance Saves Your Wallet From Major Repairs

Home Maintenance Checklist

As Needed:
  • Close fireplace damper when not in use
  • Fix leaky faucets
  • Unclog slow-running drains

Monthly:

  • Inspect and test smoke and fire alarms
  • Inspect and replace filters as necessary (air conditioner, furnace, pool and so on)
  • Clean vacuum grill and inside compressor unit of central air conditioner, when in use
  • Walk around the house exterior to check general condition

Spring:

  • Replace smoke and fire alarm batteries (at least twice per year)
  • Cut back any trees or shrubs touching the exterior (at least twice per year)
  • Inspect and touch up exterior paint
  • Inspect foundation for water penetration, settlement, and cracks
  • Inspect or treat exterior wood for splintering, decay, and inspect damage
  • Inspect window insulation and remove storm windows
  • Clean exterior or upper-story windows (twice per year)
  • Install window screens, repairing as needed
  • Clean gutters and inspect downspouts (twice per year)
  • Inspect roof for warping, aging, moss, and cracking
  • Perform seasonal pest control (quarterly)

Summer:

  • Inspect exposed plumbing areas for dampness (twice per year)
  • Fox loose or cracked caulking around tiles, sinks, tubs, showers, toilets and counters
  • Inspect appliance hoses and ventilation according to owner's manuals
  • Power wash, repair,refinish, and seal decks, reset any protruding nails
  • Clean and lubricate sliding-glass-door tracks and window tracks
  • Lubricate door hinges and locks
  • Oil garage door(s)
  • Patch driveway and other concrete, or treat asphalt
  • Perform seasonal pest control (quarterly)

Fall:

  • Replace smoke and fire alarm batteries (at least twice per year)
  • Inspect and clean fireplace and chimney
  • Service furnace or other heating system
  • Clean and adjust humidifier on furnace
  • Clean/vacuum heating ducts, grills and registers
  • Clean upper story windows (twice per year)
  • Inspect window screens and insulation, and install storm windows
  • Inspect weather-stripping around doors and replace as needed.
  • Cut back any trees or shrubs touching the roof or exterior (twice per year)
  • Clean gutters and inspect downspouts (twice per year)
  • Trim, cover, or bring in outdoor plants as needed
  • Perform seasonal pest control (quarterly)

Winter:

  • Recharge fire extinguishers
  • Wax and buff wood floors
  • Professionally clean curtains and drapes
  • Inspect and touch up interior paint
  • Inspect exposed plumbing areas for dampness (twice per year)
  • Perform seasonal pest control (quarterly)
  • Test for carbon monoxide

Disaster Preparedness: Protecting Valuable Records

Many people assume that floods, storms, hurricanes and other disasters happen to someone else and postpone taking care of family papers. But protecting family papers prepares you to deal with natural disasters.

An up to date household inventory is very valuable. When making the inventory, do not overlook tools stored in the garage, lawn furniture or food in the freezer. You may want to include a video or photographs of your inventory. An accurate inventory will help you determine if you have enough insurance to cover the contents of your home. Keep the inventory current.

Give additional copies of lists of valuables to your lawyer, the administrator of your will, a business associate, or trusted family member who doesn't live in your home.

Here's a list of the valuable papers you should keep in your safe deposit box:


  • Stocks, financial records, and bond certificates
  • Important receipts and bills of sale
  • Property records, deeds, titles, and/or leases
  • List of insurance policies
  • Automobile bill of sale
  • Household inventory
  • Military service records
  • Contracts (including promissory notes)
  • Copyrights and patents
  • Adoption papers
  • A copy of your will (his and hers)
  • Passports
  • Custody papers
  • Auto title
  • Citizenship papers
  • Birth certificates
  • Religious records
  • Death certificates
  • Income tax returns that document large transactions, unusual losses, or deductions
  • Marriage certificates
  • Divorce decrees
  • Social Security Cards
  • Retirement Papers

These valuable papers may be kept at home in a fireproof, locked box:

  • Advisers' names and addresses
  • Copies of birth and marriage certificates
  • Guarantees and warranties
  • Driver's license numbers
  • Educational records
  • Income tax returns for past 3 years
  • Employee benefits
  • Appliance manuals
  • Health Records
  • Current bank statements
  • Insurance policies
  • Rental property records
  • Loan payment books
  • Safe deposit records and inventory of items
  • Credit card numbers
  • Bank account numbers

Source: North Carolina Cooperative Extension Service Specialists, NC State University

Saturday, November 17, 2007

Disaster Preparedness: Correct Potential Hazards Before a Disaster

During and right after a disaster, any household item that can move, fall, break, or cause a fire becomes a home hazard. To minimize possible danger, inspect your home now to find and correct potential hazards.

Identifying Hazards

Check for electrical hazards

  • Replace frayed or cracked extension and appliance cords, loose prongs, and plugs.
  • Make sure there is only one plug per outlet. Avoid using cube-taps or overloading outlets. If you must use an extension cord, use a cord that’s rated for the electrical load and no longer than is really needed.
  • Remove electrical cords that run under rugs or over nails, heaters, or pipes.
  • Cover exposed outlets and wiring.
  • Repair or replace appliances that overheat, short out, smoke, or spark.


Check for chemical hazards

  • Store flammable liquids like gasoline, acetone, and lacquer thinner in approved safety cans in a storage area located away from the home. Place containers in a well-ventilated area and close the lids tightly. Secure the containers to prevent spills.
  • If flammable materials must be stored in the home, use a storage can with an Underwriter’s Laboratories (UL) or Factory Mutual (FM) approved label. Move materials away from heat sources, open flames, gas appliances, and children.
  • Keep combustible liquids like paint thinner, kerosene, charcoal lighter fluid, and turpentine away from heat sources.
  • Store oily waste and polishing cloths in covered metal cans.
  • Instruct family members not to use gasoline or other flammable fluids for starting fires or cleaning indoors.

Check for fire hazards

  • Clear out old cloths, papers, mattresses, broken furniture, and other combustible materials.
  • Move clothes, curtains, cloths, and paper goods away from electrical equipment, gas appliances, or flammable materials.
  • Remove dried grass cuttings, tree trimmings, and weeds from the property.
  • Clean and repair chimneys, flue pipes, vent connectors, and gas vents.
  • Keep heaters and candles away from curtains and furniture.
  • Keep portable heaters on level surfaces, away from high traffic areas. Purchase portable heaters equipped with automatic shut-off switches, and don’t use them with extension cords.

Safety Equipment

Check fire safety equipment

  • Install at least one smoke detector on each level of the home, especially near the bedrooms. Test detectors every month and change batteries at least once a year.
  • Keep at least one fire extinguisher (ABC-type) on hand. Maintain and recharge according to manufacturer’s instructions. Show all family members where it’s kept and make sure they know how to use it.

Secure Items

Check items that can shift or fall

  • Anchor water heater, large appliances, bookcases, tall or heavy furniture, shelves, mirrors, and pictures to wall studs.
  • Place large or heavy objects on lower shelves.
  • Install clips, latches, or other locking devices on cabinet doors.
  • Provide strong support and flexible connections on gas appliances, including the water heater.
  • Hang heavy items, such as pictures and mirrors, away from beds and places where people sit.
  • Repair any deep cracks in ceilings or foundations.


Utilities

Check your utilities

  • Locate the main electric fuse or circuit breaker box, water service shut-off, and natural gas main shut-off.
  • Contact local utility companies for instructions on how to turn off the utilities.
  • Teach family members when and how to turn off utilities.
  • Clear the area around shutoff switches for easy access. (Gas and water)
  • Attach shut-off wrench or specialty tool to a pipe or other location close by the gas and water shut-off valves.
  • Paint shut-off valves with white or fluorescent paint to increase visibility.


Home Safety

  • Plan how to escape from your home in the event of an emergency.
  • Identify at least two exits from each room.
  • Clear doors, hallways, and stairs of obstructions. Conduct emergency drills.
  • Practice daytime and nighttime escapes, and pick a safe meeting place outside the home.

Source: NC State Cooperative Extension

Thursday, November 15, 2007

Growing Sprouts

Sprouts are tasty and delicious and growing them is a simple process, although it does require a few minutes of your time each day to get quality sprouts. They can be grown year-round, and provide an opportunity to get quality for simple gardening projects for limited spaces and for children. Seeds often used for sprouting include mung bean, soybean, lentil and alfalfa.

Purchasing seeds for sprouting:


When purchasing seeds for sprouting, be sure to get seeds that have not been treated with a fungicide, insecticide or any other material. This type of seed is available at health food stores and many supermarkets.

To grow sprouts:

  • Begin with a clean, wide-mouthed quart jar with the desired amount of seed, generally not more than 1/4 cup. (Depending on the type of seed used, only one to two tablespoons may be required to fill a jar.)
  • Cover the mouth of the jar with cheese cloth and secure with a rubber band or screw-top ring, or use a commercially available screw-top sprouting lid. Soak the seeds for 8-12 hours in a volume of water at least double the amount of the seeds. This will soften the seed coat for sprouting.
  • After soaking, drain off the water and rinse the seeds. After the rinse water has been drained off, invert the jar and prop it at an angle with seed distributed evenly along the side of the jar. By placing the jar at an angle, the sprouts will have good drainage and air circulation.
  • Keep the jar in a dark place, at 68-70 degrees Fahrenheit. Sprouts grown in a light location will turn green and may be bitter and tough.
  • Continue to rinse the sprouts two to four times a day until they have grown to the desired length. Always be sure excess water is drained off the sprouts; if the sprouts remain in water, they could ferment and spoil.
  • Some seeds need only to be sprinkled over a moist cloth or paper towel to sprout. Again, keep the seeds in the dark while they sprout, and keep them moist.
  • Most sprouts will take two to five days to grow to their optimum size. Wash them thoroughly to remove the seed coat, if necessary. Sprouts may be kept for one to two weeks in the refrigerator if kept in a sealed container. Sprouts may be frozen by blanching them for three minutes and cooling them in ice water. Drain them and pack into freezer containers.

    DO NOT SPROUT TOMATO OR POTATO SEEDS--they are generally poisonous to humans.

Friday, November 9, 2007

Financial Preparedness: Preventing and Addressing Identity Theft

Identity theft is one of the fastest growing crimes in America. When a dishonest person has your Social Security number, the thief can use it to get other personal information about you. Most of the time, identity thieves use your number and good credit to apply for more credit in your name. Then they use the credit cards and do not pay the bills. You don't find out that someone is using your credit until you are turned down for credit or you begin to get calls from unknown creditors demanding payment for items you never bought. Here are some tips to prevent identity theft.


Your number is confidential

You should be careful about sharing your social security number with anyone who asks for it (even when you are provided with a benefit or service.)

Don't make it easy for someone to steal your number

Identity thieves get your personal information by:
  • Stealing wallets, purses and your mail (bank & credit card statements, pre-approved credit offers, telephone calling cards & tax information)
  • Stealing personal information you provide to an unsecured site on the Internet, from business or personnel records at work and personal information in your home
  • Sorting through trash for personal data
  • Posing as someone who legitimately needs information about you, such as employers or landlords
  • Buying personal information from "inside" sources. For example, an identity thief may pay a store employee for information about you that appears on an application for goods, services or credit.

Be careful with your Social Security card and number to prevent theft

Show your card to your employer when you start a job so your records are correct. Then, put it in a safe place. DO NOT carry your card with you.

How can I report that someone is using my Social Security number?

You should file a complaint with the Federal Trade Commission by:

If you think someone is using your number for work purposes, you should contact Social Security. One way to find out whether someone is using your number in order to work is to check your Social Security Statement. This statement lists earnings posted to your Social Security record. If you find an error on your Statement, contact Social Security immediately.

What if I think someone is using my number and creating credit problems for me?

If someone used your social security number to get credit, Social Security cannot fix your credit record. To fix your credit record:

  • Call the creditors who approved the credit (follow up with a letter.)
  • File a police report.
  • Contact the fraud department of the major credit bureaus. Ask: 1. To have a flag placed on your record, requiring creditors to contact you before approving additional credit using your name and number. 2. How long your account will be flagged and how you can extend the flag, if necessary. 3. To have a statement added to your credit report--include your name, explain the problem and provide a telephone number where someone can call you.

Obtain a copy of your Credit Report

Request a copy of your credit report from each major credit bureau and check to see if it contains any entries you do not know about. If you are denied credit, you may be entitled to a free copy of your report.

The major credit reporting agencies are:

Equifax

  • http://www.equifax.com/
  • Report fraud: 1-800-525-6285,
  • Order credit report: 1-800-685-1111.
  • PO BOX 740241, Atlanta GA 30375-0241

Experian

TransUnion

  • http://www.transunion.com/
  • Report fraud: 1-800-680-7289
  • Order credit report: 1-800-916-8800
  • Fraud Victim Assistance Dept. PO BOX 6790, Fullerton, CA 92834

Getting a New Social Security Number

If you have done all you can to fix the problem and someone is still using your number, Social Security may assign you a new number. They can help you complete an application but cannot guarantee that a new number will solve your problem.

You cannot get a new Social Security number if:

  • You filed for bankruptcy
  • You intent to avoid the law or your legal responsibility
  • Your social security card is lost or stolen, but there is no evidence that someone is using your number.

Contacting Social Security:

The social security website is a valuable resource for information about all Social Security programs. http://www.ssa.gov/

In addition to using the website, you can call toll-free 1-800-772-1213. Hours are 7 a.m. - 7 p.m. Monday through Friday. Information is also provided by automated phone service 24 hours a day.

Source: Social Security website: http://www.ssa.gov/pubs/10064.html/

Emergency & Financial Preparedness: Insurance is Vital

Will your insurance coverage be up to the job if disasters destroy your home? Ask yourself three questions now:
  • Do I have enough insurance to rebuild my home?
  • Do I have enough insurance to replace all of my possessions?
  • Do I have enough insurance to protect my assets in case of a lawsuit?"

Part of being prepared is to be able to answer that question with a resounding "yes!"


Homeowner's Insurance is designed to pay for damage to your home, its contents, protect you from financial liability if someone is injured on your property, and protects your possessions when you are away from home (i.e. stolen luggage, etc.)

Most homeowner's policies cover damage to the structure of your home, as well as personal property caused by many disasters. Fire and smoke damage, lightning, hail, explosion and theft are almost always covered. Although most homeowner insurance policies are standardized, you should examine all policies carefully and ask lots of questions before feeling comfortable with your coverage.

Flood, earthquake and sinkhole damage are almost never covered in a standard policy and need to be insured separately. Home offices, collectibles, jewelry and antiques may also need separate coverage. Homeowner's insurance only covers the structure of your home, not the land.

Two Methods of Determining Loss
Insurance companies employ two methods to determine the value of a loss--actual cash value and replacement cost.

Actual cash value is the cost of replacing damaged or destroyed property with comparable new property minus depreciation.

Replacement coverage is the cost of replacing an item with an item of the same kind and quality, with no consideration for depreciation.

Replacement value is the better of the two types of coverage because it will guarantee replacement. If your property is several years old and you have a cash value policy, your possessions may be worth nothing due to depreciation, and therefore, you are left without. If your policy does not already include replacement coverage, you can add this to your policy for an increase in premium. It may be well worth the additional premium to include this coverage.

If you are not yet a homeowner, make sure to purchase renters' insurance. This type of insurance can also protect you in case of theft, vandalism, natural disaster and liability for injury in your home or apartment. Rental properties often become victim to looting and vandalism after a disaster.

Ask Lots of Questions
An insurance policy is a legal contract that may be loaded with technical terms and hard to understand. Read it before you sign and ask if you have a question. Be very specific in the questions you ask and try to get all answers in writing. For example:
  1. Who is covered? If a volunteer is injured while helping to clean up after a hurricane, is he covered? How much of his medical bill would be covered?
  2. What is covered? Is my car covered if a tree falls on it when it is parked in the driveway? Is it covered if it is in the garage? Is the cost of tree removal covered if the tree does no damage?
  3. Am I covered for direct losses due to fire, lightning, tornadoes, windstorms, ice storms, hail, explosions, smoke, terrorism, vandalism and theft?
  4. Are my jewelry and antiques covered?
  5. What happens if I decide not to rebuild my home? Can I rebuild a different house plan--larger or smaller than my present home?
  6. If a pipe bursts and water flows all over my floors, am I covered? What if the dishwasher leaks and ruins the floor? Am I covered?
  7. What if water seeps into my basement from the ground due to flooding or sprinklers? Am I covered?
  8. If a storm causes a power outage and all the food in my refrigerator or freezer is spoiled and must be thrown out, can I make a claim?
  9. Are children and their possessions covered when they are away at college?
  10. Does my homeowner policy cover the loss if something is stolen out of my car?
  11. Is my boat covered if it is stolen? Am I covered if there is a boating accident and I am sued?
  12. Am I covered if I need to rebuild my home to a new, stricter building code?
  13. Exactly what is not covered? Have you ever heard that an "act of God" is not covered? What is an "act of God?"
  14. What personal expenses are covered after a disaster? If I can't inhabit my home because of a fire, will the insurance policy pay the hotel bills? For how long? Car rentals? For how long? Meals? For how long? Medications, clothing replacement, school supplies?
  15. When can you begin collecting the settlement money after a loss? Do you have to pay first and then submit receipts for reimbursement?
  16. Will they charge for inspector to come out and inspect the damage?
  17. How do you report a claim? Does your insurance company have a 24-hour hotline? In the case of a disaster, always call immediately after a disaster strikes. In the case of a widespread disaster, claims will be handled in the order they are received. If no one answers, leave a message. Always keep several phone numbers for your insurance company and agent in your 72-hour kit.
  18. What is the premium? How often is it due? Is there are a grace period? When will it increase? Will it increase every time I make a claim--to the point that I won't want to make a claim because of penalization?
  19. How much is my deductible?
  20. Does the policy cover actual cash value or replacement cost?

Obviously, these aren't all the questions you will need to ask, but they should help get you thinking about concerns specific to your situation.

Source: Adapted from "Insurance: Part of Being Prepared" by Carolyn Nicolaysen, Meridian Magazine

Friday, November 2, 2007

Disaster Preparedness: Advice for Evacuees

What if a natural disaster, pandemic, or terrorist attack occurs in your city and you are the one evacuating? Here is some advice that may help you if you find yourself in this situation.

1. Get good footwear now. Many people say they were not prepared to walk out or back over the debris that followed their disaster. There may not be stores left to purchase shoes or the stores will sell out quickly.

2. Money, money, money. After a natural disaster, there will be no way to confirm there is money in your account. If you bank at a local bank, it may not be able to provide services for days, weeks or months as corporations dig out and rebuild. ATM machines will be emptied of cash rapidly and there will be no employees to restock machines. When, or if, you can can find food, clothing or gas for sale, you will have to pay in cash or be out of luck. Keep several hundred dollars in cash for the big event. This should be in small denomination bills and coins. NEVER carry all your cash in one place and NEVER let anyone see you have more than a few dollars. Many people are honest, helpful and trustworthy, but it only takes one dishonest person to hold you up and steal your cash.

3. When you evacuate, bring your own toiletries. You may not think it's necessary when you head to a hotel, but their resources are limited. During an emergency, families may have to share a room with friends or large families or may be limited to one room. You should have a good 72-hour kit so you won't have to think too much about including them as you pack to evacuate. Remember toilet paper, feminine hygiene products and diapers.

4. Medications. If you are taking any prescription medications, they may not be available to you for several days or more. Local pharmacies will not be prepared for new customers in the great numbers that will need to be serviced. A national chain may not have access to computer records to fill orders. If there are no refills left on your prescription and/or if you normally purchase your medications from a small pharmacy, you will need to have your prescription rewritten. Good luck trying to find your doctor! If there is any way to stock up on a month's supply of your prescriptions, do it now and then never leave home without them. If you wear glasses, you may ask your optometrist for a copy of your prescription to include in your 72-hour kit.

5. Purchase a car top carrier. Many people gather family and pets to evacuate and there was no room in the car for everything. Do a trial run and determine how much you could take in your vehicle and how much more space you will need to accommodate everyone and everything.

6. Plan for those who are ill. Never stay at home during an evacuation warning if anyone has medical problems. If you have someone on oxygen, you need a constant supply of electricity. Even a generator will run out of gas and you could be stuck. If you have a family member with a weakened immune system, even the smallest cut that comes in contact with contaminated water could prove life-threatening.

7. Families have been separated. If you are told to evacuate, please do it. No matter how desperate you are, never allow yourself to be separated from family members. Always have an out of state contact--someone every family member knows to call just in case the worst happens. Everyone should have that phone number memorized. It may take a few days before phone services is available, but everyone should check in with that person frequently and as soon as possible. It would be advisable for every teen and adult to have a phone card for just such an emergency.

Source: Adapted from "Preparing to Provide Refuge" by Carolyn Nicolaysen, Meridian Magazine

Disaster Preparedness: Preparing to Provide Refuge

So you think because you don't live in a flood plain, near a river, or in a probable path of a wildfire, tsunami, hurricane, earthquake or tornado, that you are exempt from being prepared? Think again!

Every natural disaster has a crisis zone where victims experience the horror of life threatening danger. All around a crisis zone, others are affected by less dramatic traumas and challenges--power outages, flooding, a breakdown of infrastructure, a run on banks and stores, and a lack of services. Evacuees and refugees fill the roads, the Home Depot, the hotels, supermarkets and line up at ATM Machines.

Those escaping storms and fires evacuate to safe havens. Even if you live in an area far from a disaster zone, that disaster can affect you. Consider a few ways your home might be affected in a disaster. There are things you can do to provide a safe haven for your family and others:

1. Electrical outages occur far from the initial disaster site. After Katrina, evacuees thought they would be safe 50 miles away; the power went out there too.
  • Think Water. If there's no power many do not have a way to access water.
  • After a hurricane, tropical storm or flood, mosquitoes seem to multiply at 10 times the usual rate. If your power is out and it is summer, you won't want to sleep with the windows closed. Be prepared for good screens for all windows and doors or with mosquito netting or other loose weave fabric that can be taped or stapled around windows and doorways.
  • Consider investing in a generator. They come in handy during power outages and brownouts throughout the year.
  • Purchase glow sticks. Place them in every room in the home. White glow sticks work the best and provide light bright enough to cook or walk around without danger of tripping in the dark.
  • Outdoor solar lighting can be brought indoors to help during an outage. In the morning you can take them outside and recharge them for the next night. They work great and are safe around pets and children.

2. Store foods that are easier to prepare. Foods that can be prepared without a lot of work are worth their weight in gold when you are trying to feed a crowd of evacuees.

  • Have an inventory of things that store well. In addition, keep on hand foods that disappear first at the grocery store: Milk, bread, water, ice, fresh fruits & vegetables, hygiene items such as soap and toothpaste, feminine hygiene products, toilet paper, diapers, baby formula, headache and muscle ache medicine, anti-diarrhea medicine, insect repellent.

3. Buy Gasoline. If you live within 100 miles of a disaster, begin preparing as soon as warnings are issued or immediately after an earthquake. Fill your gas tank and keep extra gas for your generator or vehicle. The time to store fuel is ahead of disasters--now.

4. Think prescriptions. As people come to your hometown, they will be in need of prescription medications. If you are down to the last few days and an evacuation is ordered nearby, renew your prescription immediately.

5. Prepare to entertain. As conditions improve around you, children and adults will become impatient with the disaster routine. Almost certainly, you will be without electricity for a few days to a few weeks. Keep some good age-appropriate books, travel editions of favorite games, coloring books and crayons for the kids, balls and other toys for outdoor use. If you are the designated evacuation site for family and friends, you will need to have these items on hand. Everyone should have small games and other small items in a 72-hour kit.

6. Sanitation can be a huge problem. Have extra soap and toothpaste on hand for evacuees. Also consider acquiring a port-a-potty (bucket type) especially if you are dependent on well water. Wet wipes, hand sanitizers and extra water storage provide excellent water supplies for clean-up and essential laundry.

7. Garbage becomes a concern. Have plenty of large plastic trash bags or bio-hazard bags on hand. Because no one will have the energy or desire to clean up after meals, stock a supply of paper plates, cups, bowls and plastic utensils. Have a strategy for managing the waste they create.

Source: Adapted from "Preparing to Provide Refuge" by Carolyn Nicolaysen, Meridian Magazine

Cooking with Basic Food Storage: Lori Dunford's Whole Wheat Recipes


Lori Dunford is famous in our ward for her delicious and nutritious whole wheat recipes. I've included some she demonstrated for our Relief Society. I have sampled them and they are wonderful!


14 GRAIN BREAD
6 C Warm Water
2 T Salt
2/3 C Oil
2/3 C Honey
3 T Dough Enhancer
3 C High Gluten Bread Flour
3 T SAF Yeast or Other instant yeast
6-8 C Freshly Ground Flour (10-11 C Unground Grain)
1 pkg of 9 grain cracked wheat cereal
1 C Sunflower Seeds
1/3 C Millet
1/3 C Flax Seed
1/3 C Sesame Seed
1/3 C Amaranth

Put all ingredients together and add additional flour 1 C at a time until dough starts to pull away from sides, continue kneading for an additional 10 minutes. (Lori's Note: I used the same recipe, only proofed the yeast by putting in 2/3 C of tepid water with 1 T of sugar, set aside and let get bubbly. I also added 6 T of lecithin. I omitted the dough enhancer and high gluten bread flour and used 100% whole wheat flour)

WHOLE WHEAT DINNER ROLLS
3 C Milk
1 C Butter
1 C Sugar or Honey
3 T Salt
4 T Instant Yeast
5 eggs
5-6 C Whole Wheat Flour
5-6 C White Flour

Melt Butter and add milk. Add 4 C of flour. Add beaten eggs, sugar, salt and add additional flour until dough barely starts to pull away from sides. Take out. Let rise 10 minutes, shape and let rise until double in bulk. Bake in 350 degree oven until done 12-15 minutes. (Lori's Note: I made 100% whole wheat dinner rolls by proofing the yeast in 1/2 c tepid water, 2 t. of sugar and the Yeast. If you desire to freeze, let rise 10 minutes, shape and place on well-greased cookie sheet. Cover. Take out 3 hours before you desire to serve them and let rise on greased cookie sheet until you bake them.)

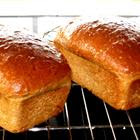
LORI'S 100% WHOLE WHEAT BREAD
In a 1 Quart Glass Measuring Cup, place 1 C Tepid water with 1 T of sugar and 4 T of yeast. Stir and set aside.

In Bosch or other mixer, Add:
8 C Tepid Water
1 C Honey
4 T Salt
1/4 C Molasses
1/2 C Lecithin

Add 10 C Whole Wheat Flour, mix until smooth. Add 1 C Oil, 1 more cup of flour and continue mixing until smooth. Add yeast, then gradually add additional flour until dough starts to pull away form sides. Continue to knead for 10 minutes. Take out of bowl and place in greased bowl and let rise 10 minutes. Form loaves by dividing dough into equal parts and put in greased bread pans. Poke with fork. Let rise until 2 fingers above the pan. Place in preheated oven at 350 degrees. Leave oven door open for first three minutes and then close for remaining 27 minutes. Bake, take out of pan and put on cooling racks or paper towels. After cooled, you can slice bread and put into bags. Freezes very well.

Saturday, October 27, 2007

Financial Preparedness: Learn to Curb Impulse to Buy

Is impulse shopping taking a heavy toll on your budget? Here are six ways to get a handle on your spending:

Identify your triggers
Many people use shopping as an emotional outlet. But letting your emotions dictate your spending is nearly always a bad idea. To break yourself of the habit, try to determine what prompts you to spend unwisely and take steps to change your behavior.

Avoid temptation
If you're inclined to overspend, consider a self-imposed ban on window shopping, casual browsing and unnecessary trips to the mall. Hint: If you know you're going to be in a situation where you're likely to be tempted, leave your credit card at home and only bring as much cash as you absolutely need.

Be a cautious consumer
You may think you're immune to advertising, but even the savviest shoppers fall prey to marketing tactics now and again. Next time you see yourself eyeing a "new and improved" product, ask yourself why you feel compelled to buy it. Will that new golf club/razor/skin cream substantially improve your life or just deplete your bank account?

Take a time-out
If you stumble on a "must have" item, don't get caught up in the excitement advises MSN Money columnist Liz Pulliam Weston. Take a deep breath and walk away. Give yourself anywhere from a few days to a few weeks to figure out if this is something that you can afford and really need. After the cool-down period, if you can truthfully answer yes to both questions, go ahead and splurge.

Focus on long-term goals
Before you buy, ask yourself if you'll get more long-term satisfaction out of owning this item, paying down your debt or putting money toward that dream vacation. You may get a temporary boost from buying that scarf, but that doesn't mean it's the best use of your money.

Check your balance
If you find yourself standing in the checkout line, ready to buy something you're not sure you can afford, hold off, suggests Weston. Go to your local bank or log on to your bank account online. Once you've viewed your balance, the purchase may appear far less enticing.

Source: "Learn to curb impulse to buy" by Marshall Loeb, McClatchy Newspapers, 10/26/07

Friday, October 26, 2007

New Findings for Longer-Term Food Storage

Findings of recent scientific studies conducted by a team of researchers at Brigham Young University show that properly packaged, low-moisture foods stored at room temperature or cooler (75°F/24°C or lower) remain nutritious and edible much longer than previously thought. The studies, which are the first of their kind, increase the estimated shelf life for many products to 30 years or more (see chart for new estimates of shelf life). Previous estimates of longevity were based on "best-if-used-by" recommendations and experience.

Though not studied, sugar, salt, baking soda (essential for soaking beans), and vitamin C in tablet form also store well long-term. Some basic foods do need more frequent rotation, such as vegetable oil every 1 to 2 years.

While there is a decline in nutritional quality and taste over time, depending on the original quality of food and how it was processed, packaged, and stored, the studies show that even after being stored long-term, the food will help sustain life in an emergency.

For tips on how to best preserve longer-term food storage products, see Longer-Term Supply.

New "Life Sustaining" Shelf-Life Estimates
Wheat: 30+ years
White rice: 30+ years
Pinto beans: 30 years
Apple slices: 30 years
Macaroni: 30 years
Rolled oats: 30 years
Potato flakes: 30 years
Powdered milk: 20 years

Source: http://providentliving.org/

Prepare your Car for Winter

Winter storms can hit suddenly and severely. Keeping safe in the car is a necessity. Preparing your car for the winter can be as easy as adding a few supplies and taking a few necessary steps which will keep your family safe and warm on the road.


WINTER ITEMS FOR THE CAR TRUNK:

1) Tool kit: Equipped to handle basic repairs on the road. It should contain jumper cables, fix-a-flat, duct or electrical tape, adjustable crescent wrench, Philips and flat head screwdrivers and pliers.

2) Shovel (preferably collapsible)

3) Extra gas container

4) Tow rope

5) Flashlight with extra batteries

6) Windshield Scraper

7) Tire jack

8) Compass

9) Road maps

10) Box of kitty litter or sand for traction in the snow

11) Extra set of clothing for every member of your family: Socks, sweaters, pants and hats are most essential. Wool is the best insulator as it keeps you warm even when wet. Synthetic fibers such as polypropylene are also good especially if your skin is sensitive to wool. Cotton is a a poor choice as it is non-insulating and absorbs water. Make sure your jackets or coats are waterproof.

12) Bright red cloth: Recognized as a distress call when tied to your antenna.

13) Enough food and water for two or three days: Light weight and shelf stable items such as food bars pack a lot of energy without taking up much space. Water is available in foil packs or water boxes.

14) A few light sticks or candles: Dusk comes early and it's comforting to have a little light if batteries run low in the flashlights.

15) First Aid Kit

16) Knife

17) Large empty can with cover and toilet paper (for sanitation needs)

18) Portable radio

Source: Emergency Essentials, http://beprepared.com/Articles/Winterizecar.html

Frugal Food Storage

When you want to begin a food storage program but have little money to do so, try these simple tips to begin a "Frugal Food Storage Plan."

1. Each week when you bring home the groceries, go through each bag and ask "Can we do without this item this week?" If you can, set it aside as a food storage item.

2. Store any storable food that comes from unexpected sources. For example, if friends or family invite you to dinner or bring in a meal to you, store the canned or packaged food items you would have used for that meal.

3. Set aside a small amount of money each week to buy staples such as pasta, baking ingredients and paper products. You may be surprised at how quickly you can build up a supply of these staples for only a few dollars a week.

4. Learn how to bottle, freeze and dry fresh foods. Even if you don't have a garden, you can preserve small amounts of fresh fruits or vegetables when they are one sale at the grocery store.

5. Set goals for your food storage supply. Work toward a one-month supply, then a three-month supply, and so on. Be realistic.

Try new ideas until you find the ones that work for you. The important thing is to start now; don't wait until you have more money or you may never start. Next family home evening, go through your cupboards and set some of your food aside for your food storage You can have a food storage program, even on a modest income.

Source: Adapted from "Frugal Food Storage" by Colleen Hansen, Ensign, January 1993.

7 Major Mistakes in Food Storage

1) VARIETY: Most people don't have enough variety in the their storage. We get tired of eating the same foods over and over and may prefer not to eat than to sample that particular food again. Don't just store wheat, store a variety of grains and a variety of beans. Store flavorings such as tomato, bouillon, cheese and onion.

2) EXTENDED STAPLES: Few people get beyond storing the four basic items (wheat, honey, powdered milk, and salt). Store dehydrated and/or freeze dried foods as well as home canned and store bought canned goods. Make sure you add cooking oil, shortening, baking powder, soda, yeast and powdered eggs. You can't cook even the most basic recipes without these items.

3) VITAMINS: Vitamins are important, especially if you have children, since children do not store body reserves of nutrients as adults do. A good quality multi-vitamin and vitamin C are the most vital. Others may be added as your budget permits.

4) QUICK AND EASY PSYCHOLOGICAL FOODS: Quick and easy foods help you through times when you are psychologically or physically unable to prepare your basic storage items. No cook foods such as freeze dried since they require little preparation. MRE's (Meals ready to eat), canned goods, etc. are also very good. Psychological foods are the goodies--jello, pudding, candy, etc. that you should add to your storage.

5) BALANCE: Keep well-balanced as you build your storage. Buy several items, rather than a large quantity of one item. If something happens an you have to live on your present storage, you'll fare much better having a one month supply of a variety of items than a year's supply of two to three items.

6) CONTAINERS: Always store your bulk foods in food storage containers. Food kept in sacks are highly susceptible to moisture, insects and rodents. If you are using plastic buckets, make sure they are lined with food grade plastic liner available from companies that carry packaging supplies. Never use trash can liners as these are treated with pesticides. The best container is the #10 tin can.

7) USE YOUR STORAGE: It's vital that you and your family become familiar with the things you are storing. You need to know how to prepare these foods. This isn't something you want to learn under stress. Find recipes and learn to use these foods!

Source: Adapted from "The Seven Major Mistakes in Food Storage" by Vicki Tate. She is the author of Cooking with Home Storage.

Friday, October 19, 2007

Cooking with Basic Food Storage: Baby Food Recipes


Main Ideas


  • A baby should be breast fed from the day it is born if at all possible.

  • Mothers who cannot breast feed their babies should give them special formulas.

  • A baby should begin eating other foods at about six months.

Recipes for Baby Food


GRUEL FROM BOILED RICE:


THIN GRUEL: 1/2 Tbsp Boiled Rice, 1/2 C Water. Boil 10 minutes. Yield 5 Tbsp.


THICK GRUEL: 4 Tbsp Boiled Rice, 1 C Water. Boil 10 minutes. Yield 12 Tbsp.


SOFT RICE: 1 C Boiled Rice, 1 C Water. Boil 5 minutes. Yield 1 1/2 Cup.


You can make other gruels from corn or oats as well as from starchy foods such as cassava, potato and yam. Wheat does not make a good gruel for babies under the age of one year because it causes allergies.


EGG YOLK RICE GRUEL: 1/2 C unsalted meat or chicken broth, 2 Tbsp Boiled Rice, 1 beaten egg yolk, 1 Tbsp milk or evaporated milk. Add broth to rice and mash with the back of a spoon. Bring to a boil. Combine egg yolk and milk. Add to the rice-broth mixture. Lower heat and cook three minutes. Give to babies seven to eight months or older.


MIXED VEGETABLE & BEAN PUREE: 1/4 c water from unsalted cooked vegetables (or purified water), 1/4 c boiled beans, mashed, 1/3 c tender greens, 1 Tbsp milk or evaporated milk. Add water to greens and boil for 5 minutes. Remove from fire, mash well and pass through a sieve. Add milk and cook 2 minutes, stirring constantly. Give to babies seven to eight months or older.


For most babies, the first solid food is rice cereal, followed by oatmeal and barley. Generally, it's good to introduce wheat and mixed cereals last, since they may cause allergic reactions in very young babies. Using a blender or food processor, your baby can have many fresh foods instead of canned or bottled. Everything should be soft, unsalted, well-cooked and unseasoned. Cook fresh vegetables and stew fruits for easiest preparation.


WARNING Do not prepare these foods: Beets, Turnips, Carrots, Collards. In some parts of the country, these vegetables contain large amounts of nitrates, a chemical that can cause an unusual type of anemia in young infants.


Thursday, October 18, 2007

Spicing Up Your Food Storage

"Spicing it up" is important, especially when you're cooking with basic food storage items. So once you acquire grains, legumes, nonfat dry milk, sugar, oil & salt, start gathering a year supply of spices and flavorings.

  • Beef, chicken or ham bouillon granules or cubes: Adds flavor to rice, barley & wheat. Also a base for soups, sauces & casseroles.
  • Soy Sauce: Adds saltiness to stir-fry vegetables & fried rice, stews, chicken & fish.
  • Flavor Enhancers: Red & Black Pepper, Paprika, Turmeric, Vinegar, Dry or Prepared Mustard, Tabasco Sauce, Worcestershire Sauce.
  • Aromatic Herbs like Marjoram, Thyme, Oregano, Dill, Basil & Sage: Add flavor to soups, casseroles, salads and sauces.
  • Aromatic Seeds like Anise, Caraway, Celery, Coriander, Cumin, Dill, Fennel, Poppy & Sesame Seeds: Good sprinkled over home-baked breads and rolls or stirred into salad dressings.
  • Sweet Spices like Cinnamon, Nutmeg, Cloves, Ginger, Allspice & Mace: Sweetening effect to breads, puddings and cereals and cookies.
  • Favorite Flavors like Vanilla, almond, lemon & Maple extracts: Enhance flavor in the simplest cookies and cakes.
  • Cocoa, Sweet Cocoa Mix: Supplements Nonfat Dry Milk
  • Punch Powder: Flavors water, puddings and pie fillings.

Note: For long-term storage, keep unopened boxes, cans or jars of spices and herbs in a closed plastic container or bag and store in a cool, dry, dark place. Once spices are opened, keep them sealed in a second container to maintain their flavor and aroma.

Source: Adapted from Ensign Article by Josephine Newton

Dry Pack Canning: How Many Cans Will I Need?

How Many #10 Cans Will I Need?

Wheat 50 lbs/9 cans
Sugar 50 lbs/9 cans
Beans 50 lbs/9 cans
Rolled Oats 50 lbs/18 cans
Light Weight Foods 50 lbs/18 cans
Flour 25 lbs/6 cans
Spaghetti 5 lbs/1 can
Lentils 5 lbs/1 can
Ziti 2 1/2 lbs/1 can
Elbows 3 lbs/1 can
Sugar 5 lbs/1 can
Granola 3 lbs 14 oz/1 can
Oatmeal 1 lb 40 oz/1 can
Grits 4 lbs/1 can

Wednesday, October 17, 2007

Using Old Food Storage

Remember that you should rotate your food storage on a regular basis. However, if you haven't, it is still possible to use some old food storage. You simply have to be creative.

Shelf Life of Dehydrated, semi-perishable food stored in cans below 70 degrees: Approximately 5 years.

Shelf Life of Perishable Foods (not dehydrated such as bottled fruits): Best if eaten within 2 years.

Ideas for Using Old Food Storage:

Old Flour: Make pumpkin bread. The loaves may be shriveled, shrunken & crumble more easily but the taste is far better than plain white bread.

Old Powdered Milk: Can be mixed into a pudding recipe.

Old Brown Rice: Can be made into Spanish Rice.

The best thing to do is just experiment. Be creative in cooking to disguise the taste, smell and flatness of old food storage.

USE EXTREME CAUTION. Don't use bloated cans or cans that have been exposed to extreme temperatures.

Recipes Using Old Canned Fruit:

DRIED FRUIT LEATHER
Drain the juice from the bottle, put the fruit in a blender, puree thoroughly. If fruit is dark, add 1/4 C of crushed pineapple. This restores the color right before your eyes. Line a cookie sheet with plastic wrap. Anchor edges with masking tape so plastic will not flop over puree. Pour puree evenly over plastic (about 2 C per cookie sheet) and set in the sun to dry, or in a hot car, or in a dehydrator. The fruit leather is finished when you can pull if off the plastic leaving no residue. Fruit that is five or six years old may be used and the resulting product is still delicious.

FRUIT CAKE
2 C Fruit (pureed old fruit) or applesauce, pineapple, cherries
2 Tbsp Margarine
1/2 to 3/4 box of cake mix (yellow or white is best)
Put fruit in a bowl, add margarine and stir. Add the cake mix and gently stir (lumps in the mixture are fine). Pour into a lightly greased 10X10 inch glass pan. Microwave at full power for 5 minutes. Turn, then microwave for 2 more minutes. Best when served with ice cream.

HAWAIIAN BREAD
3 1/2 C pureed fruit
1 10-oz. package moist flaked coconut
4 eggs, beaten
1 1/2 c sugar
4 C Flour
2 tsp Salt
2 tsp Soda
Combine all ingredients in order given. Bake one hour at 325 degrees in two greased loaf pans.

FRUIT SMOOTHIES
2 C canned fruit with juice
3/4 C Non-instant milk or 1 1/3 C instant milk
1 to 2 drops almost flavoring or 1 Tbsp lemon juice
Blend in the blender until smooth. Add 1/2 tray of ice cups and blend until thick.
Variations: Use 2 scoops of vanilla ice cream in place of the ice.

DELICIOUS CAKE
1/2 C White Sugar
1/2 C Brown Sugar
2 C Sifted Flour
1/2 tsp Salt
1 tsp Soda
2 tsp Baking Powder
2 tsp Cinnamon
1/4 tsp cloves
2 eggs
1 C Vegetable Oil
2 C Drained Old Fruit, Blended
1/2 C Each Raisins and Nuts
Combine sugar, flour, salt, soda, baking powder, and spices together and set aside. Beat eggs and salad oil until creamy. Add drained fruit and dry ingredients. Beat until smooth. Add nuts and raisins. Bake in 11X7 oblong cake pan or 10X10 square pan at 350 degrees for 30 minuets. Cake is rich enough without frosting.

FRUIT MUFFINS
2/3 C Sugar
1/3 C Shortening
1 Egg
1/4 C Honey
1 C Milk
2 C Flour
1 tsp Baking Soda
1 tsp Baking Powder
1 tsp Salt
1/2 C Drained Canned Fruit, Chopped
Cream sugar and shortening together. Add egg and mix well. Add honey and milk, taking care to scrape the bowl often. Add sifted dry ingredients and mix at low speed just until blended. Fold in drained fruit. Fill greased muffin tins 3/4 full. Bake at 375 degrees for 15-20 minutes. Makes 12 muffins.

COBBLER
1/2 Cube Soft Margarine
1/2 C Sugar
1 C Flour
2 tsp Baking Powder
1/2 tsp Salt
1/2 C Milk
Combine and place in the bottom of a 9X13 pan. Spoon 1 quart of your choice of fruit. Sprinkle with sugar then pour juice over all. Bake at 350 degrees for 45-50 minutes. Serve warm with whipped cream or ice cream.

FRUIT BARS
1 quart bottle of any canned fruit (juice and fruit)
4 tsp baking soda
1 C oil
1 1/2 C Sugar
2 tsp cinnamon
1 tsp nutmeg
1/2 tsp cloves
Set aside 1/4 c fruit juice for glaze. Partially blend the fruit and juice, leaving some pieces of fruit. Add the baking soda to the blended fruit. This mixture will bubble. Stir 1 cup oil and 1 1/2 c sugar into the bubbling fruit mixture. Mix in cinnamon, nutmeg and cloves. Add the flour (nuts and raisins may be add if desired) Pour batter into a well greased and floured cookie sheet. Bake at 350 degrees for 20-35 minutes or until done. (Inserted toothpick will come out clean.) Top with glaze made from 1/4 c fruit juice, powdered sugar and margarine.

Source: Emergency Essentials, "Don't Dump Old Food Storage-Be Creative" www.beprepared.com/Articles/dont.html

Saturday, October 13, 2007

Canning Instructions for Plastic Buckets

Purpose:

To provide instruction for members who would like to keep their food storage in plastic containers.

Guidelines:

  1. For plastic buckets to be used as dry food storage containers, they should be made of food grade plastic and have a gasketed lid.

  2. Carbon Dioxide effectively prevents weevil infestation in dry-pack items stored in plastic buckets. To kill weevils, carbon dioxide should be present in concentrations above 3 percent. Treatment methods that depend on the absence of oxygen to kill weevils, such as oxygen absorbers and nitrogen gas flushing, are not always effective in plastic buckets because of the potential for oxygen leakage.

Instructions for Dry Ice Treatment in Buckets:

  1. Use approximately 1 ounce of dry ice for each gallon of container size.

  2. Wipe frost crystals from the dry ice using a clean towel.

  3. Place the dry ice in the center of the container bottom.

  4. Pour the food on top of the container and until it is within 1/2 inch to 1 inch of the top

  5. Place the lid on top of the container and snap it down only about halfway around the container.

  6. Allow carbon dioxide gas to escape from the partially sealed lid as the dry ice evaporates.

  7. Allow the dry ice to evaporate completely before sealing the container. To see if the ice is all gone, feel the bottom of the container. If it is still very cold, the ice has not all evaporated.

  8. Watch the container for a few minutes after sealing the lid. If the container bulges, slightly lift the edge of the lid to relieve pressure.

  9. It is normal for the lid of the bucket to pull down slightly as a result of the partial vacuum caused when the carbon dioxide is absorbed into the product.

2008 Dry Pack Canning Schedule

Begin planning now to dry pack can during the months the canning equipment is available in the ward. Look for sales and stock up on things you would like to store.

January: Nazareth
February: Stroudsburg
March: Nazareth
April: Honesdale
May: Scranton
June: Tunkhannock
July: Nazareth
August: Tunkhannock
September: Stroudsburg
October: Scranton
November: Honesdale
December: Nazareth

Friday, October 12, 2007

Cooking with Basic Food Storage: Sourdough Recipes

SOURDOUGH STARTER
2 c warm water
1 pkg. dry yeast
2 c flour
1 Tbsp sugar

Put warm water into crock. Sprinkle yeast over water and stir with wooden spoon until dissolved. Add flour and sugar. Mix until smooth. Cover and set aside 36 to 45 hours Stir 3-4 times a day. Use 1 1/2 cups of the starter in bread recipe.

To store remainder: Beat 2 cups flour and 2 cups warm water in remaining starter batter. Let stand in warm place at least 5 hours. Cover and store in refrigerator. Allow water needed in bread to warm to room temperature before using. Never add anything to starter but the flour and water needed to keep it going.

Do not use Metal spoons or containers

SOURDOUGH BREAD
1 pkg dry yeast
1 1/2 c sourdough starter
3 1/2 - 4 c flour
1 1/2 c sourdough starter
2 Tbsp sugar
2 tsp salt
1 egg
Mix starter, yeast and 1 cup warm water. Let stand until yeast is dissolved. Add remaining ingredients, except egg. Punch down. Form into loaves. Cover and let rise until doubled. Beat egg and brush over unbaked loaves. Bake in 400 degree oven for 30-35 minutes.

SOURDOUGH PANCAKES
1 c sourdough starter
2 eggs, beaten
2 c milk
3 Tbsp melted shortening
2 tsp baking soda
2 c flour
1 tsp salt
2 Tbsp sugar
About 12 hours before planning to serve pancakes, mix starter batter with the flour, milk and salt. Let stand in bowl, covered with cheesecloth in warm place. Just before baking pancakes, remove 1 cup of batter to replenish starter in crock. To remaining batter in the bowl, add soda, salt, eggs, shortening, and sugar. Mix well. Bake on lightly greased hot griddle. For thinner pancakes, add more milk.

SOURDOUGH ENGLISH MUFFINS
2 c sourdough starter
3/4 c buttermilk
2 3/4 - 3 c flour
6 Tbsp cornmeal
1 tsp baking soda
1/4 tsp salt
Mix together sourdough starter and buttermilk. Combine flour, 4 Tbsp of the cornmeal, soda, salt and add to the buttermilk mixture. Stir to combine using hands when necessary. Turn onto lightly floured surface; knead until smooth, adding more flour if necessary. Roll dough to 3/8 inch thickness.

Cover and let rise a few minutes. Using a 3 inch cutter, cut muffins. Sprinkle sheet of waxed paper with the remaining cornmeal. Cover and let rise until very light, about 45 minutes. Bake on medium hot, lightly greased griddle about 30 minutes, turning often. Cool and split. Toast and serve with butter. Makes 12-14 muffins.

SPOON BREAD
2 (8 oz) sour cream
2 jiffy cornbread mixes
1 egg
1/2 c melted butter
1 ( 1 lb) can peaches, cut up or 1 (1 lb) can cream style corn
Grease 2 quart casserole. Mix sour cream, egg, butter, cornbread mix and peaches or cream styled corn together. Pour into casserole dish and bake at 350 degrees for 65-70 minutes, until golden brown and puffed.

Wednesday, October 10, 2007

Dutch Oven Recipes


They say that the pioneers brought Dutch ovens across the plains. While only the very essentials were packed on the wagons to make the journey to the west, Dutch ovens were included. This tells us that they were important to pioneer life.

Lemon Chicken
12" Dutch Oven. . . . . . . . .350 degrees
5 - 6 lbs. boneless, skinless chicken breasts
1 1/2 c flour
1 Tbsp seasoned salt

Lemon Sauce:
1/2 bottled lemon juice
Rind from 1 lemon, grated
Juice from above lemon
3/4 c sugar
2 1/2 c water
3 Tbsp cornstarch
Pinch salt

Mix flour and seasoned salt together. Dredge chicken flour. Brown in oil. Sauce: Mix lemon juice, rind and juice, sugar, water, cornstarch and salt together and pour into heated Dutch Oven. Stir until thickened. Add browned chicken and cook 30 minutes. 8 coals on bottom of oven and 16 coals on top.

Barbecue Chicken and Potatoes
12" Dutch Oven. . . . . . . 350 degrees
6-8 boneless, skinless chicken breasts
10 medium potatoes, sliced
3-4 onions, sliced
1 (18 oz.) bottle BBQ sauce

Place half of the potatoes in the bottom of the Dutch oven. Place a layer of onions on top of the potatoes. Repeat Next place the chicken breasts on top of the potatoes and onions. Top with any remaining onions. Pour BBQ sauce over all ingredients. Put the lid on the Dutch oven. Place 12 briquets on tip of the Dutch oven and 12 underneath. Cook for about 1 1/2 hours.

Easy Dutch Oven Chicken and Potatoes
12" Dutch Oven.............................350 Degrees
6-8 Boneless, skinless chicken breasts
10 medium potatoes, quartered
2 onions, sliced
1 lb. carrots, cut
1 (16 oz) bottle Italian salad dressing. Cut each chicken breast into two pieces. Put all ingredients into Dutch oven. Place 12 briquets on top of oven and 12 underneath. Cook for about an hour.

Chicken and Dressing
14" Dutch Oven
12 Boneless, skinless chicken breasts
1/2 cube butter
1/2 c chopped celery
1 medium chopped onion
2 cans cream of mushroom soup
1 box stuffing mix (rice-a-roni)
salt and pepper to taste
Saute butter, onions, celery and chicken until meat is white on both sides. Stir in soup , salt &pepper. Simmer for 1 hour. Add dry stuffing mix. Cook 10 minutes and serve. 14 coals on top of oven and 14 coals on bottom.

Sweet & Sour Chicken
12 chicken breast
1 cup honey
2 (10 oz.) bottles sweet & sour sauce
1 (12 oz.) Bullseye BBQ sauce
1 chopped green pepper
3 medium onions
1 lb. fresh mushrooms
1 large can chunk pineapple
Salt, pepper and quarter breasts and lay them 1st in the bottom of oven. Layer the rest of the ingredients, in the above order ending with mushrooms. cook for 1 1/2 hours with 12 coals on bottom and 20 on top.

Old Fashioned Dutch Oven Potatoes
12" Dutch Oven..................350 degrees
6 slices bacon cut into bite sized pieces
2 medium onions, sliced
5 lbs. potatoes, sliced
1 c chopped mushrooms
1 can cream of mushroom soup
1 c shredded cheese

Warm Dutch oven and cook bacon until almost done. Add onions and cook till lightly brown. Put in potatoes and stir together. Cover and cook until potatoes are almost done. About 20-25 minutes. Add mushrooms, cover and cook for 5 minutes. Add soup and cook for 5 minutes, heating all the way through. Remove from heat. Spread cheese over the top. Cover and let stand till cheese melts.

Au Gratin Potatoes
12" Dutch Oven.....................350 degrees
14-16 shredded cooked potatoes, cooled
1 can cream of celery soup
1 can cream of chicken soup
1 lb. sour cream
1 stick butter or margarine
1/4 c chopped green onion
2 cups crumbled corn flakes
1/2 c grated cheese
Melt 3/4 stick butter in Dutch oven. Add potatoes, soups, sour cream and onions. Melt 1/4 stick butter and pour over corn flake crumbs. Add crumb mixture to cheese. Top potato mixture with cheese mixture. Cook 45 minutes. 12 coals on top and 12 coals on bottom.

Cowboy Potatoes
12" Dutch oven.................................350 degrees
12 medium potatoes, sliced
3 medium onions, diced
12 sliced bacon, diced
Salt and Pepper to taste
1-2 c frozen peas
2 cups cheddar cheese, grated
Brown the bacon in a 12" Dutch oven using 15 coals on the bottom. Wen well browned, use a slotted spoon to remove bacon from the grease. Place bacon on paper towel to drain and set aside. Lightly brown onions in bacon grease. Stir in sliced potatoes and salt and pepper. Cook 35-45 minutes until potatoes are tender, stir in frozen peas and bacon. Sprinkle cheese on top. Remove coals from the bottom but leave approximately 15 coals on the lid to melt the cheese.

Mountain Man Breakfast
12 inch Dutch oven
2 lbs. Ground Sausage
2 lb. bag hash browns
8 eggs
grated cheese
23 briquettes
Using 12 " Dutch oven, brown sausage, then take out. Put hash browns in bottom of oven, then put browned sausage on top of hash brown. Whip the eggs and pour over sausage evenly. Put grated cheese on top. Place 8 briquets under Dutch oven and 15 on top. Cook 20-30 minutes until eggs cooked.

BBQ Spareribs
12" Dutch Oven......................350 degrees
4-5 lbs boneless spareribs
3-4 onions, sliced
1 large bottle (18 oz.) BBQ Sauce
Place one layer of spare ribs on the bottom of the Dutch oven. Then place a layer of sliced onions on top of spare ribs. Repeat until all meat and onions have been used. Pour entire bottle of BBQ sauce over the top of the onions and meat. Put the lid on the Dutch oven. Place 12 briquets on top and 12 underneath. Cook for about 1 1/2 hours.

Dutch Oven Lasagna
12" Dutch Oven
1 lb. hamburger, browned and drained
2 pkgs dry spaghetti sauce seasoning
1 qt. bottled tomatoes
2 cans tomato sauce, plus 1 can water
Mix above ingredients together.
16 oz. cottage cheese
shredded mozzarella cheese
Lasagna noodles, uncooked
Parmesan cheese
Make sauce with hamburger, bottled tomatoes, tomato sauce, water and spaghetti seasoning. Put a little sauce in bottom of Dutch oven. Layer uncooked noodles over sauce in bottom, then a layer of cottage cheese. Repeat layers with more sauce, noodles and cottage cheese. End with a little sauce on top. Cover top with mozzarella and Parmesan cheeses. Bake for approximately 1 hour. Coals 14-16 on top, 8-10 on bottom.

Grandma Vera's Beans
14" Dutch oven
Brown in hot oven (14-16 briquets) 2 lbs ground beef and 1 lb diced onion
Add, cook until clear: 2 large onions, diced and 2 green peppers, diced.
Stir in and simmer 10-15 minutes: 1 cube precooked ham, 3-16 oz jars Homestyle Chile Sauce, 1 1/2 c brown sugar, 1 1/2 c catsup, 3/4 c Dijon mustard.
Drain and add to mixture: 4 (31 oz.) cans pork and beans.
Reduce briquets and simmer with top and bottom heat for 45-60 minutes. Crack lid slightly, allowing moisture to escape, if necessary. Beans should be slightly thick. Serves 25-30.

To save time, start this recipe one day ahead. Prepare main mixture, omitting beans until ready to cook. Refrigerate overnight. Blended flavors make this a great second day dish.

Hunter's Stew
14" Dutch oven
12 carrots
2 onions
1 lb frozen corn
2 cans cream of chicken soup
8 stalks celery
5-7 lbs of stew meat
8 large potatoes
1 lb fresh mushrooms
2 cups minute rice
2 cans cream of mushroom soup
1/2 cup flour
Coat stew meat with the flour and brown in butter in the bottom of the dutch oven, stirring frequently until the meat is nicely browned. Season with salt and pepper to taste. Cut up potatoes, carrots, onions, and celery. Add to pot. Add 1 can cream of mushroom soup and 1 can cream of chicken soup. Add rice, corn and mushrooms. Top with two remaining cans of soup. Add water to the top of Dutch oven. Put the lid on. Place 14 briquets on top of oven and 14 underneath. cook about 1 1/2 hours. . . .checking every 15 minutes.

Son of a Gun Stew
14" Dutch oven
1 lb carrots, diced
2 Tbsp Worcestershire Sauce
3/4 c soy sauce
7-8 drops Tabasco sauce
2 cans refrigerator biscuits
2 lbs cubed stew meat
1 quart Tomatoes
3 lbs. potatoes, diced
2 green peppers, chopped
5 stalks celery, sliced
3 medium onions, chopped

Put meat, onions and celery in bottom of heated Dutch oven with small amount of oil and brown well. Add all other ingredients and stir well. Cover and cook with 14 to 16 coals on bottom and 20 or more on top. Stir occasionally until vegetables are almost tender. Put refrigerator biscuits on top. Cook another 20 minutes or until biscuits are browned.

Dutch Oven Tacos
5 lbs. hamburger, browned
5 (30 oz.) cans tomato sauce
5 (15 oz.) cans pinto beans
10 tsp chili powder
5 medium onions
5 (15 oz.) cans kidney beans
5 (15 oz.) cans corn
Pepper
Brown meat and onions. Add tomato sauce, drained beans and corn. Add chili powder and simmer until flavors blend. Serve over chips. Top with lettuce, sour cream, salsa, diced tomatoes, olives and cheese. This will serve 25 boys.

Raspberry Surprise
12" Dutch Oven
1 White Cake Mix
1 Can Raspberry Pie Filling
1 Can Sprite
Mix Cake mix and sprite together. Pour cake mixture into oiled Dutch oven or if you lined the oven with foil, make sure to spray foil with nonstick spray. Pour raspberry pie filling on top and cook for 20 minutes using 16 coals on top and 8 coals on bottom.

Peach Cobbler
12" Dutch oven
1 box yellow cake mix
(2) 1 quart bottles peaches
1 can 7-up
Line Dutch oven with foil (sides & bottom). Line it so no liquid can seep through. Drain peaches. Dice peaches. Pour them into bottom of Dutch oven. Pour cake mix on top of peaches. Pour soda over cake mix in a crisscross pattern. Slightly break up chunks of mix with a fork. Seal Dutch oven with lid and put 10 briquets on bottom and 12 on top. Be sure to rotate oven every 10 minutes. Cook 30-45 minutes.

Fruit Cocktail Pudding Cake
12" Dutch oven
2 large cans fruit cocktail, drained
2 cups sugar
2 tsp salt
1 cup nuts
about 1/2 brown sugar
2 tsp baking soda
2 cups flour
2 eggs
Mix fruit cocktail, sugar, flour, eggs, baking soda and salt well and pour into greased Dutch oven. Sprinkle nuts and brown sugar on top. Cook 45-60 minutes. 8 coals on bottom and 14-16 coals on top. Top with Cool Whip.

Pineapple Upside-Down Cake
12" Dutch Oven
3 Tbsp butter
1 can (20 oz) sliced pineapple
1/2 c brown sugar
1 yellow cake mix
1 1/4 c water
1/3 c oil
3 eggs

Line Dutch oven with foil. Place 9 coals under the oven. Melt butter in foil-lined pan. Arrange pineapple slices in bottom of oven. Sprinkle brown sugar evenly over fruit. Prepare cake mix according to package directions. Carefully pour the cake batter over the fruit. Bake 30-40 minutes until cake is brown and springs back when touched. Use 9 coals on bottom of oven and 12 on the top.

Dutch Oven Rolls
4 c scalded milk
1 c sugar
4 eggs
1 c water
2 cubes butter
12-13 cups bread flour
3 Tbsp Yeast
1 1/2 Tbsp Salt

Scald milk (don't boil). Add butter to milk and let it melt. Dissolve yeast in warm water with a sprinkle of sugar added. Set aside. Add milk mixture to 4 cup flour, salt and sugar and mix. Add yeast mixture and more flour. Just slightly mix until blended. Add eggs and add all but 2 cups of flour. Dough will be sticky. Cover and let rise until double. Add rest of flour or flour until dough is still soft but easy to work with. line a 14 or 16 inch Dutch oven (you will need several) with tin foil and spray with non-stick cooking spray. Roll bits of dough into balls (a little bit bigger than a golf ball). Place in Dutch oven so almost touching. Pour 1/4 to 1/2 cup melted butter over rolls. Cover and let rise until double. While rising, get coals ready. For a 14 inch Dutch oven, you will need 10 coals at the bottom and 18-20 coals on top. A 16 inch oven will need 12 coals on bottom and 20-22 coals on top. Cook 20 minutes.

Variations: You can make navajo tacos with dough. Flatten balls and fry in pan with oil. You can eliminate the eggs for more bread-like rolls. Also dough can be divided and rolled into 3 24" inch strips and braided. Then put in foil lined oven around outer edge. Melt 1/4 - 1/2 cup butter and pour over bread. Bake with coals the same only at least 1/2 hour to 45 minutes for bread loaf.

Hint: It works best if you do not mix roll dough very much. Some kneading and mixing is needed but keep it to a minimum.

Scones
1 Tbsp Dry Yeast
2 tsp salt
4-5 c flour (substitute 3 c white and 2 c whole wheat flour)
Oil for frying
2 cups warm water
1/3 c powdered milk
1/4 c sugar
2 Tbsp butter
Sprinkle yeast over warm water. Add sugar, salt and milk. Mix well. Stir in 2 cups flour and butter. Beat until smooth, 3-4 minutes. Add more flour until a soft dough forms. Knead 3-5 minutes until smooth. Let rise for 1 hour or until doubled. Punch down. Heat 3" of oil to 350 degrees in large Dutch oven. Pinch off small balls of dough and flatten. Fry for 3-4 minutes per side until golden. Drain on towels.

Trek Bread Recipe


  1. Put approximately seven cups of flour in a large pan or bow. Make five wells with your hand. The flour can be all whole wheat, a mix of white and wheat or all white.

  2. In the middle well, pour 1 package of yeast and pour lukewarm water over the top so that that it will start dissilving. Don't let the yeast run out of the well.

  3. In the remaining wells, place the following ingredients: 1/2 c shortening, 2 tsp Salt, 3/4 c powdered milk (unmixed), 2 Tbsp Honey

  4. Mix thoroughly.

  5. Add water until the dough becomes sticky (dough must be sticky for the ingredients to mix.)

  6. Knead well (this is the crucial stage).

  7. Add flour until the mixture becomes dough-like.

  8. Place in Dutch oven and cover with lid.

  9. Set the oven in a warm place (but not too near the fire) so that it can rise.

  10. Later in the afternoon, after the dough has risen, build the fire up and let it burn down again.

  11. With the shovel, pull enough coals off to the side of the fire for the Dutch oven to sit on. Place the Dutch oven on top of the coals.

  12. cover the Dutch oven lid with coals(the coals must be red, truy to avoid the ashes also, you can stack another Dutch oven on the tope of this one and place coals on it too).

  13. Allow to bake (takes about 30 minutes) It should be golden brown on top. Be sure to check the bottome so it doesn't burn.

Preparedness Quotes

"When faced with the choice to buy, consume, or engage in worldly things and activities, we all need to learn to say to one another, 'We can’t afford it, even though we want it!' or 'We can afford it, but we don’t need it—and we really don’t even want it!'" - Elder Robert D. Hales, April 2009 General Conference

"Many areas of the world have experienced difficult economic times. Businesses have failed, jobs have been lost, and investments have been jeopardized. We must make certain that those for whom we share responsibility do not go hungry or unclothed or unsheltered. When the priesthood of this Church works together as one in meeting these vexing conditions, near miracles take place.

"We urge all Latter-day Saints to be prudent in their planning, to be conservative in their living, and to avoid excessive or unnecessary debt."
- President Thomas S. Monson, October 2008 Priesthood Session, General Conference

"Avoid the philosophy that yesterday's luxuries have become today's necessities. They aren't necessities until we make them so. Many enter into long-term debt only to find that changes occur; people become ill or incapacitated, companies fail or downsize, jobs are lost, natural disasters befall us. For many reasons, payments on large amounts of debt can no longer be made. Our debt becomes as a Damocles sword hanging over our heads and threatening to destroy us."
- President Thomas S. Monson, April 2006 General Conference

“We have built grain storage and storehouses and stocked them with the necessities of life in the event of a disaster. But the real storehouse is the family storeroom. In words of revelation the Lord has said, ‘Organize yourselves; prepare every needful thing’ (D&C 109:8.)”
President Gordon B. Hinckley

"We need to make both temporal and spiritual preparation for the events prophesied at the time of the Second Coming. And the preparation most likely to be neglected is the one less visible and more difficult--the spiritual. A 72-hour kit of temporal supplies may prove valuable for earthly challenges, but, as the foolish virgins learned to their sorrow, a 24-hour kit of spiritual preparation is of greater and more enduring value.

"We are living in the prophesied time 'when peace shall be taken from the earth' (D&C 1:35,) when 'all things shall be in commotion' and 'men's hearts shall fail them' (D&C 88:91.) There are many temporal causes of commotion, including wars and natural disasters, but an even greater cause of current 'commotion' is spiritual." Elder Dallin H. Oaks

“Every father and mother are the family’s store keepers. They should store whatever their family would like to have in case of an emergency…(and) God will sustain us through our trials.” President James E. Faust

“We live in a most exciting and challenging period in human history. As technology sweeps through every facet of our lives, changes are occurring so rapidly that it can be difficult for us to keep our lives in balance. To maintain some semblance of stability in our lives, it is essential that we plan for our future. I believe it is time, and perhaps with some urgency, to review the counsel we have received in dealing with our personal and family preparedness. We want to be found with oil in our lamps sufficient to endure to the end.”- Elder L. Tom Perry, Ensign, Nov. 1995

"Many more people could ride out the storm-tossed waves in their economic lives if they had their year's supply of food. . . and were debt-free. Today we find that many have followed this counsel in reverse: they have at least a year's supply of debt and are food free." President Thomas S. Monson

"Just as it is important to prepare ourselves spiritually, we must also prepare ourselves for our temporal needs. … We have been instructed for years to follow at least four requirements in preparing for that which is to come.

“First, gain an adequate education. Learn a trade or a profession to enable you to obtain steady employment that will provide remuneration sufficient to care for yourself and your family. …

“Second, live strictly within your income and save something for a rainy day. Incorporate in your lives the discipline of budgeting that which the Lord has blessed you with. As regularly as you pay your tithing, set aside an amount needed for future family requirements. …

“Third, avoid excessive debt. Necessary debt should be incurred only after careful, thoughtful prayer and after obtaining the best possible advice. We need the discipline to stay well within our ability to pay. …

“Fourth, acquire and store a reserve of food and supplies that will sustain life [if local laws permit such storage]. Obtain clothing and build a savings account on a sensible, well-planned basis that can serve well in times of emergency. As long as I can remember, we have been taught to prepare for the future and to obtain a year’s supply of necessities. I would guess that the years of plenty have almost universally caused us to set aside this counsel. I believe the time to disregard this counsel is over. With events in the world today, it must be considered with all seriousness.” - Elder L. Tom Perry, October 1995 General Conference

“Maintain a year's supply. The Lord has urged that his people save for the rainy days, prepare for the difficult times, and put away for emergencies, a year's supply or more of bare necessities so that when comes the flood, the earthquake, the famine, the hurricane, the storms of life, our families can be sustained through the dark days. How many of us have complied with this? We strive with the Lord, finding many excuses: We do not have room for storage. The food spoils. We do not have the funds to do it. We do not like these common foods. It is not needed -- there will always be someone to help in trouble. The government will come to the rescue. And some intend to obey but procrastinate.” - The Teachings of Spencer W. Kimball, p.375

“All too often a family's spending is governed more by their yearning than by their earning. They somehow believe that their life will be better if they surround themselves with an abundance of things. All too often all they are left with is avoidable anxiety and distress” - Elder Joseph B. Wirthlin

"Be prepared in all things against the day when tribulations and desolations are sent forth upon the wicked." D&C 29:8

"Too often we bask in our comfortable complacency and rationalize that the ravages of war, economic disaster, famine, and earthquake cannot happen here. Those who believe this are either not aquainted with the revelations of the Lord, or they do not believe them." President Ezra Taft Benson

"Fear not little flock; do good; let earth and hell combine against you, for if ye are built upon my rock, they cannot prevail. . .Look unto me in every thought; doubt not, fear not." D&C 6:34, 36

"I believe that the Ten Virgins represent the people of the Church of Jesus Christ. . . They (five foolish) had the saving, exalting gospel, but it had not been made the center of their lives. They knew the way but gave only a small measure of loyalty and devotion.

"The foolish asked the others to share their oil, but spiritual preparedness cannot be shared in an instant. . . . This was not selfishness or unkindness. The kind of oil that is needed to illuminate the way and light up the darkness is not shareable. . . . In our lives the oil of preparedness is accumulated drop by drop in righteous living." - President Spencer W. Kimball

“We encourage families to have on hand this year’s supply; we say it over and over and over and repeat over and over the scripture of the Lord where he says, “Why call ye me, Lord, Lord and do not the things which I say?” How empty it is as they put their spirituality, so-called, into action and call him by his important names, but fail to do the things which he says." - President Spencer W. Kimball


http://en.petitchef.com/index.php?action=tag
myhomegrownfamily.typepad.com/MormonMommy.gif/"/>

Disclaimer

All data and information provided on this site is for informational purposes only. I make no representations as to accuracy, completeness, currentness, suitability, or validity of any information on this site & will not be liable for any errors, omissions, or delays in this information or any losses, injuries, or damages arising from its display or use. All information is provided on an as-is basis.